


 Erin Moore
Workflow automation is an essential feature of marketing automation that can be intimidating to implement. However, with careful planning and execution, it can be a powerful tool to automate your marketing and make processes more efficient and connected.
Streamline Business Processes with Workflow Automation
What is Workflow Automation and Why is it Important?
In today's fast-paced business world, time is money. That's why workflow automation is becoming increasingly popular among engineering and industrial manufacturing companies.
By automating repetitive tasks, businesses can boost productivity and reduce costs. Workflow automation can also streamline business processes, making them more efficient and connected.
If you're looking to implement workflow automation, HubSpot is an excellent tool to get started. With careful planning and execution, it can be a powerful tool to automate your marketing and make processes more streamlined. Keep reading to learn about the key components of workflow automation and how to implement it successfully.
Transform Your Workflow: 7 Essential Steps to Successful Automation
Workflows are an advanced marketing automation feature. However, if you follow these 7 steps, you’ll soon find yourself with a well thought-out workflow that works for you.
- Determine the Type of Workflow Automation
- Set the Goal of the Workflow
- Define the Audience, Triggers, and Exclusions
- Frame Out the Workflow Step-by-Step
- Develop the Workflow Automation Components
- Build the Workflow
- Evaluate and Revise
Determine The Type of workflow Automation
Workflows can be used for a multitude of purposes--from automating internal alerts and property updates to nurturing not-quite-ready leads with targeted emails. Start by determining the type of workflow that best suits your purpose.
An internal workflow will focus on updating a contact property, sending an internal email alert, setting and assigning tasks, or anything that does not involve reaching out externally to a contact. These workflows run behind the scenes to automate your marketing and make processes more efficient and connected.
An external workflow will involve reaching out to contacts directly via email to nurture leads, re-engage lapsed contacts or follow-up post download/trial/meeting. We’re going to focus on external workflows in this post, although all seven steps are equally important when developing internal workflows.
Set the goal of the Workflow
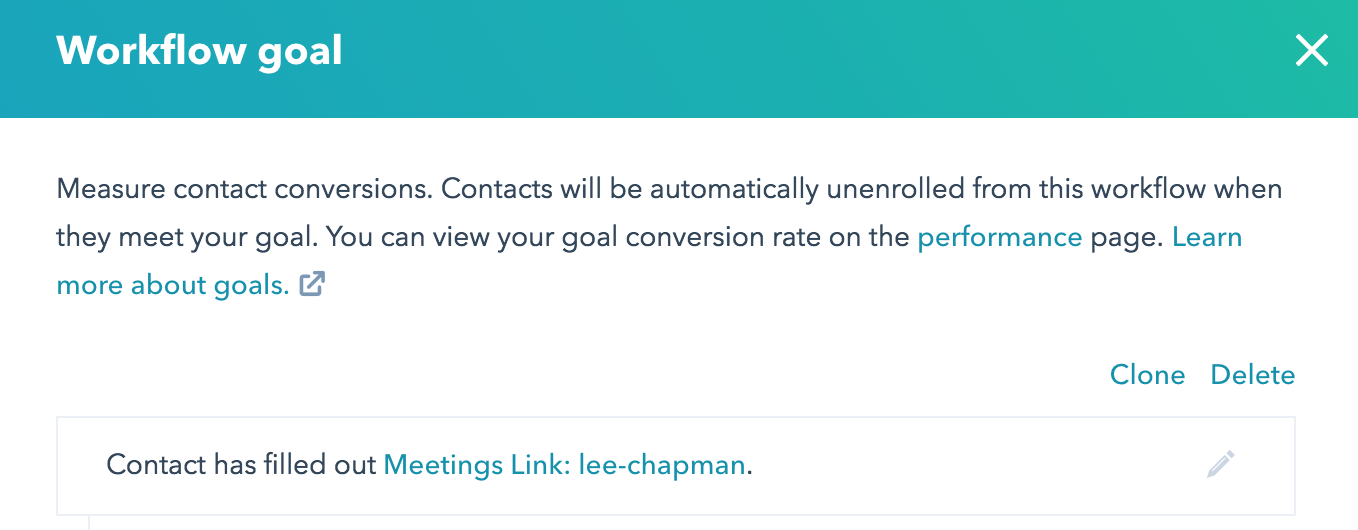
With that said, it’s time to set the workflow goal. What’s the purpose of the workflow? Are you nurturing leads to download a resource or complete a contact us form? Determine your end goal before you start thinking about actions to ensure every step of the workflow leads logically to this over-arcing goal.
For example, you have a segment of your audience that has not opened an email or been to your website in 18+ months. They’re taking up space in your CRM, and you either want to entice them to become active again or remove them from your system. Your workflow goal for this re-engagement campaign would then be based on activity- email opens or click-throughs of the workflow email, or even a re-opt-in. Anyone who does not take the goal action would be removed from your database after workflow completion.
Define audience, triggers and exclusions
Now that you have a goal, it’s time to figure out who should and should not be included. Are you nurturing contacts that fall within a certain persona? Are you re-engaging inactive contacts and using a smart list?
Determine who you want to reach, then decide how you will define these people for your marketing automation tool. This may involve building a smart list, checking utilization of the desired properties, or even importing a static list from an event for follow-up.
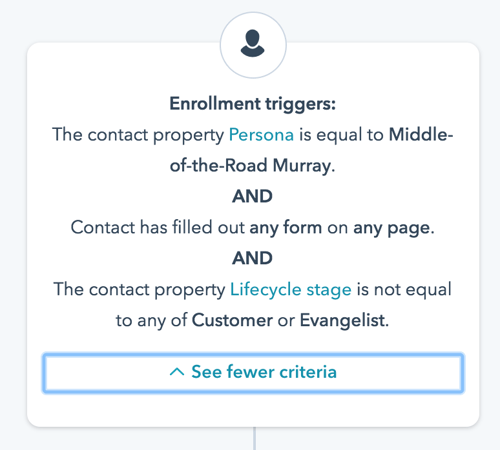
Your list or criteria will serve as the trigger for the workflow. Another way to think of this is--how will these people get added to the workflow? Sometimes, this is as simple as list membership. Other times, you may want to trigger a workflow after a contact completes a form, hits a certain lead score or visits a specific page. Define the criteria you’ll use in your tool to avoid hiccups in setting triggers later on.
Just as important as defining who is included is to determine who should be excluded. For example, in a lead nurturing campaign, you may want to exclude current customers, partners and employees.
Frame out the workflow step by step
At this point, you’ve picked a workflow type, defined a goal and set an audience. Now, you can finally start fleshing out the workflow with actions. I like to do this the old-fashioned way, with a pencil and paper, but you could also use digital workflow tools.
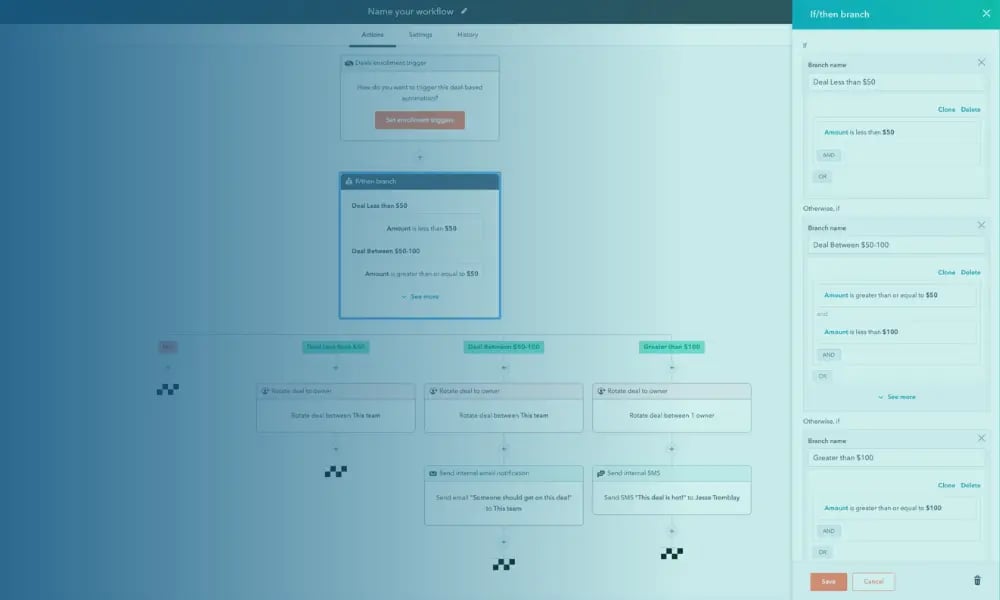
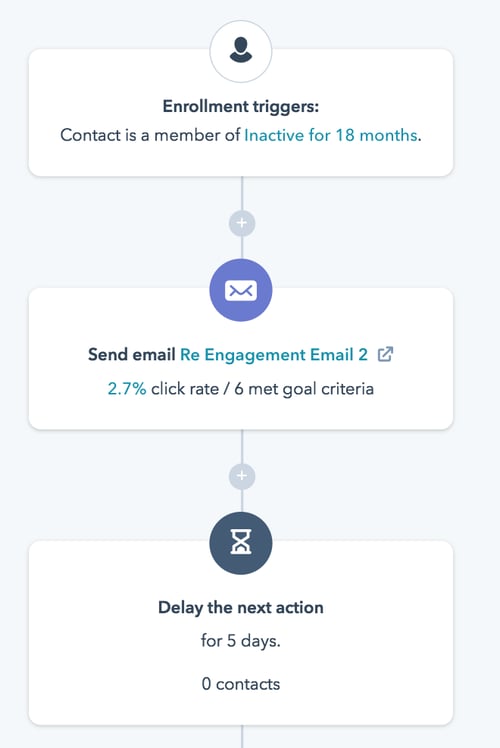
Starting with the trigger, frame out all the steps of the workflow, including emails, time delays, if/then branches and any internal actions. Keep your target personas and goal in mind when deciding on the number of emails, length of time delays and branching logic. A typical nurture will include 3 to 5 emails, with time delays of 3 to 7 days between each. If you’re using branching logic, keep in mind that the time delay must be set before the if/then branch- otherwise, the contact will immediately move through the branch before he/she has a chance to take any action.
Another good rule of thumb is to keep if/then branches to a minimum, at least when starting out. It’s easy to get carried away and end up with an extremely complex workflow that doesn’t efficiently accomplish your goal. Use a branch if you need to split out contacts by actions taken in the workflow to deliver relevant, targeted content to a group based on the action they took.
Develop the workflow Automation components
It’s time to build the trigger list, write the email copy and set up the emails in your tool. This is also a good time to check that any resources you’re linking to are up-to-date and include a CTA that advances your overall goal.
Each resource should have a micro-goal leading to the overall workflow goal. If the entire workflow is leading a contact to the contact us form, the first email goal might be click-throughs to a top-of-the-funnel content piece. The second email might then lead to a middle-of-the-funnel download with a goal of form completion.
Build the workflow
Your foundation is set, the blueprints drawn, and you can finally head over to your marketing automation tool! At this point, it should be quick and easy to set up the workflow.
Add in your goal, set the workflow trigger and build out the workflow components, linking your newly created resources. You’ll have the option to enroll all contacts who currently meet the trigger criteria, or you can choose to only enroll new contacts moving forward. Pick the option that makes more sense for your workflow goal and audience.
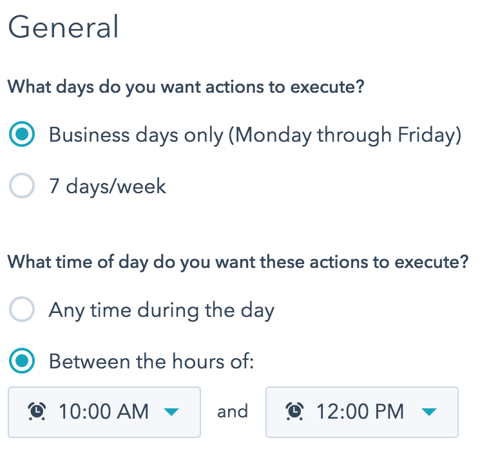
Once the workflow is built, take a look at settings. Here, you can set the workflow to execute during the business week at set times and define any exclusions. When you’re happy with the workflow, go ahead and turn it on! Congratulations, you’ve launched your workflow.
Evaluate and revise
…But, you’re not done yet. Once the first contacts have completed the workflow, evaluate the results.
Are email opens dropping off as contacts progress? You might need to decrease the number of emails.
Are click-throughs especially low on one email? The CTA might not be resonating with your audience.
Make tweaks based on the results and track continued performance. Even if the workflow is not going to run past the first group, be sure to evaluate the results and identify any issues to avoid in future workflows.
If you're interested in learning more about workflow automation and how it can benefit your business, continue to explore our blog for more insights and tips.
TREW is a marketing agency dedicated to reaching engineering and technical audiences through a range of marketing initiatives. Contact us today to learn more about the services we offer.
Erin Moore
 Erin has worked with 50+ technical companies across website strategy, content development, sales enablement, and marketing tool stack development. She’s a strategy-first marketer with a passion for persona development and a deep understanding of how marketing metrics tie into the bottom line. Erin holds a B.S. in public relations with a minor in anthropology from the University of Florida. She lives in Austin, TX, with her husband John and their dog and cat.
About TREW Marketing
TREW Marketing is a strategy-first content marketing agency serving B2B companies that target highly technical buyers. With deep experience in the design, embedded, measurement and automation, and software industries, TREW Marketing provides branding, marketing strategy, content development, and digital marketing services to help customers efficiently and effectively achieve business goals.